My Boat Project: Part II
By Bryan Reilly
Posted 6/12/02
Well, I obviously missed the Hammapoluza trip in order to get some things done, and after checking out the posts from the get together, I really hope this is going to be worth missing that! I saw the fish brought in and all I can say is WOW!!! NICE FISH! Looked like a great time was had by all. Sorry Zach, looks like you'll have to win another two tourneys before you can make a shot at a trifecta.
Back to the boat...
After glassing in the floor, I had to do something about the seams, as they would allow the floor to flex -- a definite no-no if I want to keep carpet in there for any length of time.
Another trip to AutoZone and I picked up the fiberglass version of Bondo body filler -- the same stuff I had to use on the nose. Wouldn't you know it, it works great! The floor no longer flexes.
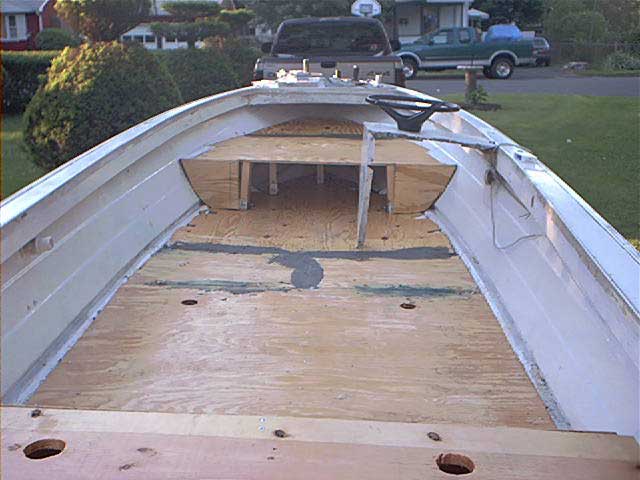
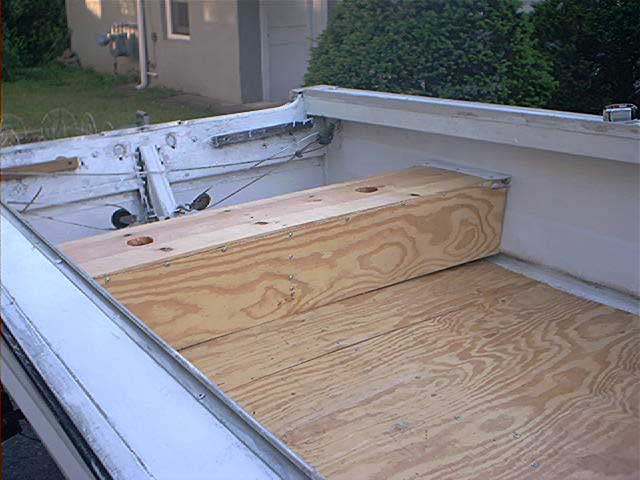
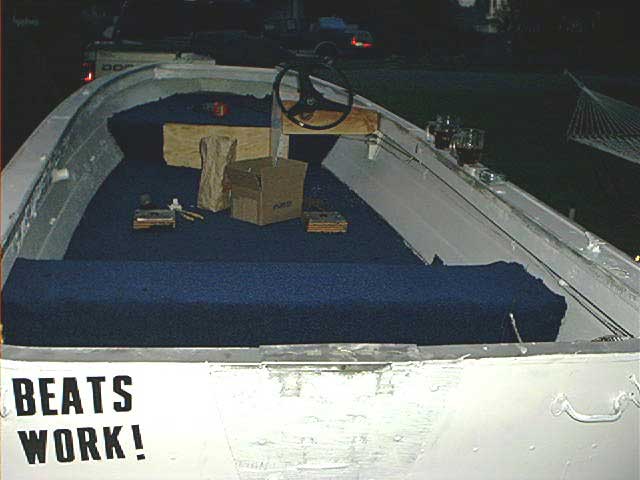
Time for tying in the hull so it won't flex. In my floor plan, I went with a rear bench, front casting deck layout, just because I like an open boat. A lot of thought (and measurement, did I mention beer?) went into building the front deck in order to get rigidity and still have some storage. The only reason I went with a front opening door as opposed to a top side door was just for added strength.
Joist mounts worked to stabilize the top portion of the platform, which was cut for two pieces of wood. The rear bench will actually be nothing more than a platform for mounting seats, but gives the hull even more rigidity. The boat now feels solid, as apposed to an empty beer can.
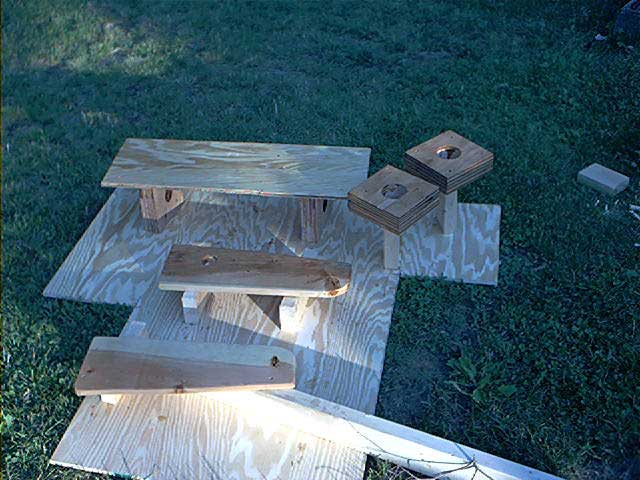
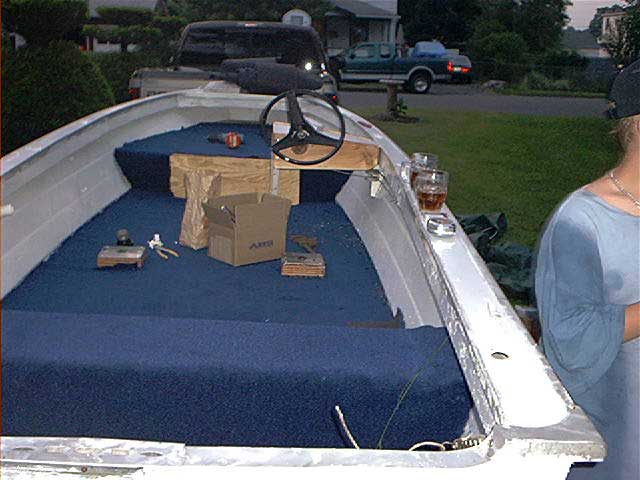
Next up was glassing the bench and deck with the resin to waterproof it. Then, mounting the seat mounts on the floor. My buddy Jim actually made these blocks you can see on the floor. They are just five pieces of plywood nailed together. They are center cut with a 2-½ inch hole in the middle so the pedestal mount would allow enough room for the seat mount to fit in without going through the bottom of the boat (Jim always comes up with the cool sh*t!).
For the dashboard, I traced the originals onto a solid piece of pine, cut, and rough sanded with 80-grit sand paper, followed by glass resin to finish them. They actually look like I spent time on them. Hint, invest in stocks from the Bondo company before you start a project like this -- a little return on investment!
By the time you guys tied into those giant slobs of stripers at Hammy, I was making my first cuts on the carpet. I went with cutting it out of one piece of marine grade carpet, which can be found at Lowes for about $4.40 a foot (6 feet wide), MUCH cheaper than any marina I've seen it at (usually $9.90 a foot).
Unfortunately, I ran out of daylight to snug and glue in the carpet, so this is as far as I got this past weekend. Hopefully, my next article will be my last and I'll be sending photos of the finished product.
Remember, all this was and still can be done avoiding marinas all together, as all of the materials used were from hardware stores, Wal-Mart and auto care stores, helping to keep the cost down. This wasn't necessarily a "cheap" excursion, but still a lot less than purchasing a ready-to-run boat of equal value -- and you pay into it over time.
The next article will be re-powering, wiring (yeah! NOT) and hardware. Again, hopefully it will be the last article and I'll be fishing in the boat!